Showing posts with label Easter Cards & Projects. Show all posts

Tuesday, February 14, 2023

Picket Fence Studios February 2023 Release

Hello!


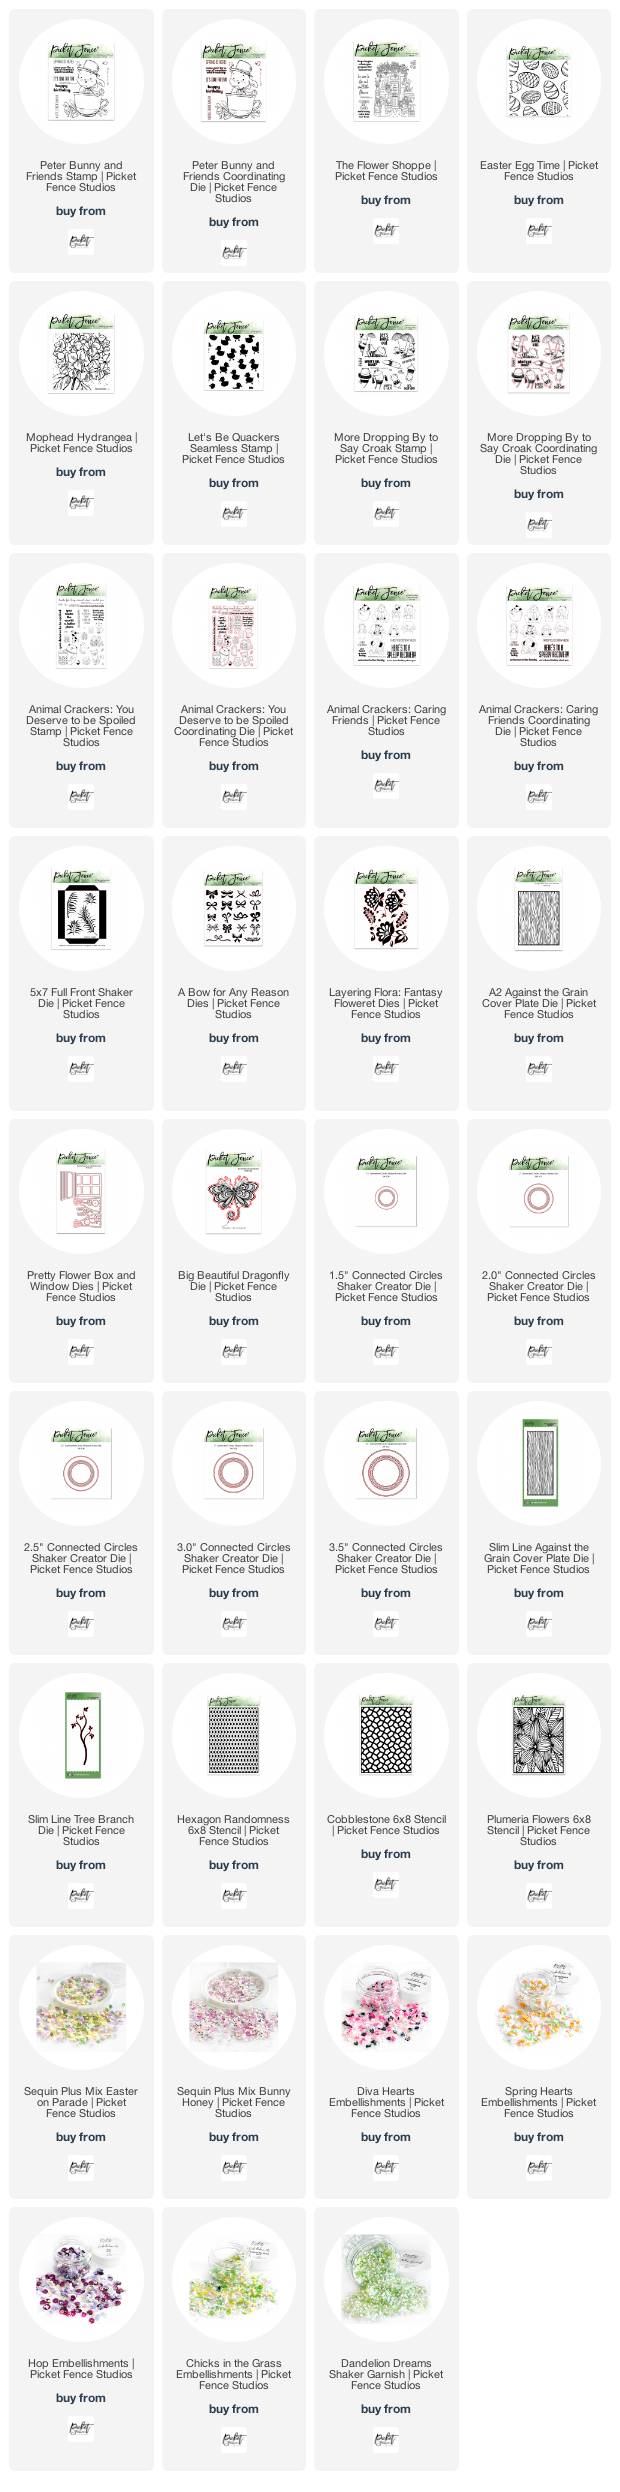
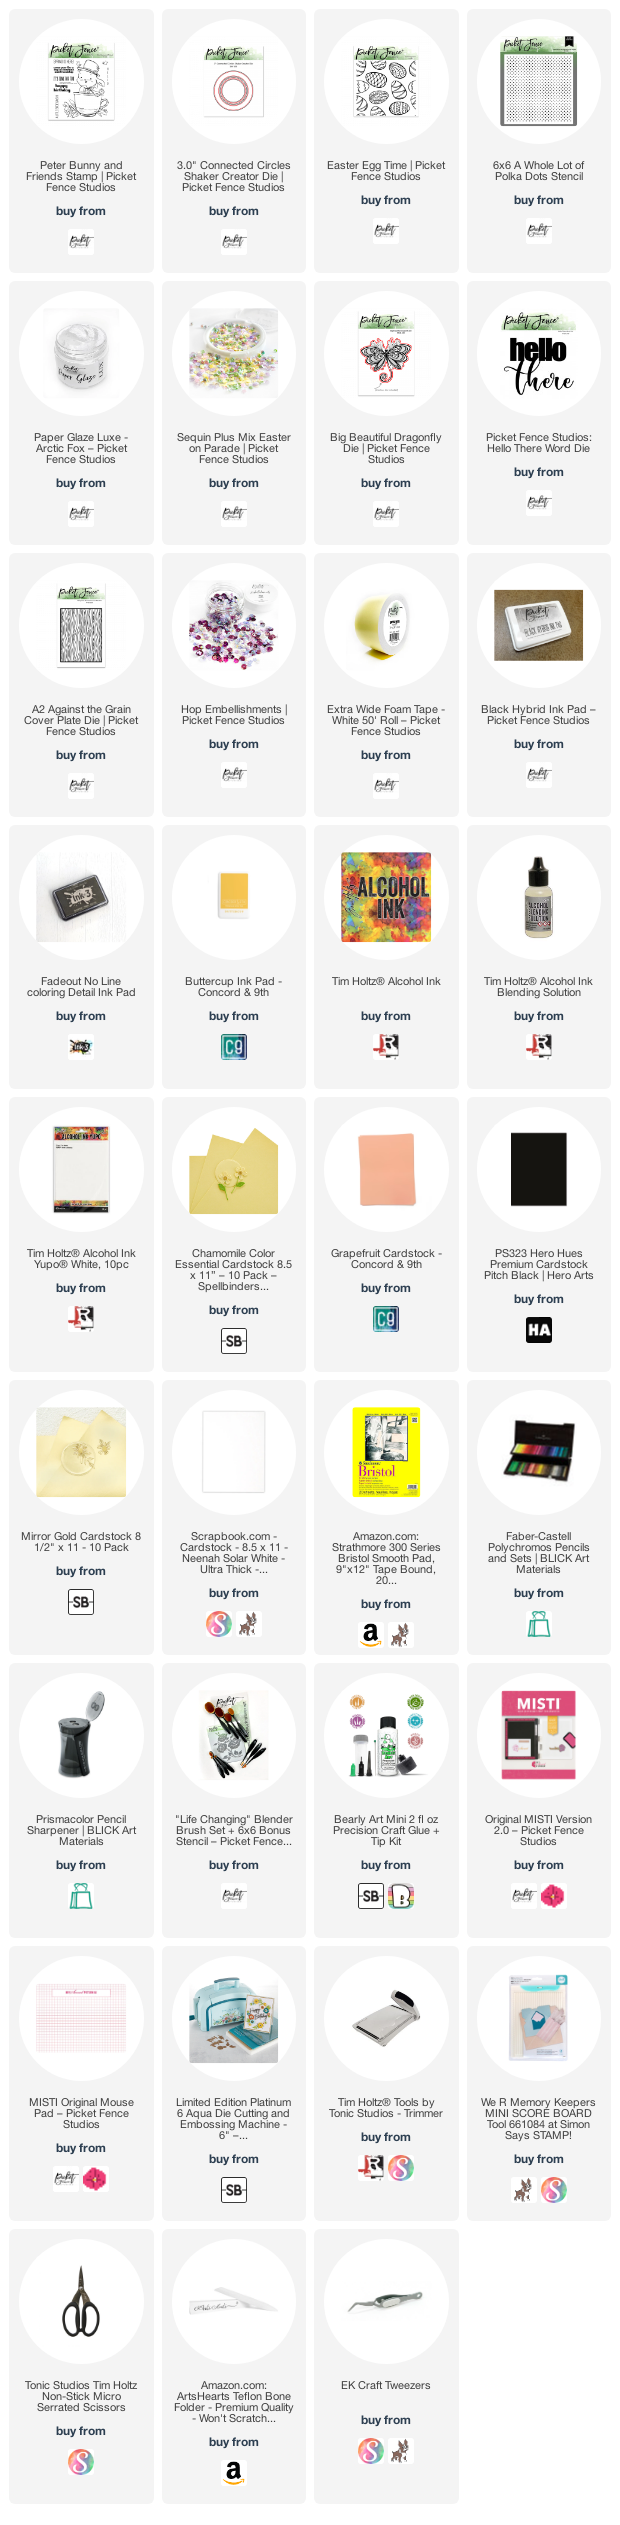
It's the 14th of the month, which means that there is a new release from Picket Fence Studios.  As always, I have the entire release listed below, so that you can peek at all the new offerings, and then I have a couple of cards to share with you showcasing some of the new products.  

The February 2023 Release:

If the list below does not load for you, you can click here to view it in another window.
Specific products used in the cards below will be listed separately at the bottom of the post.

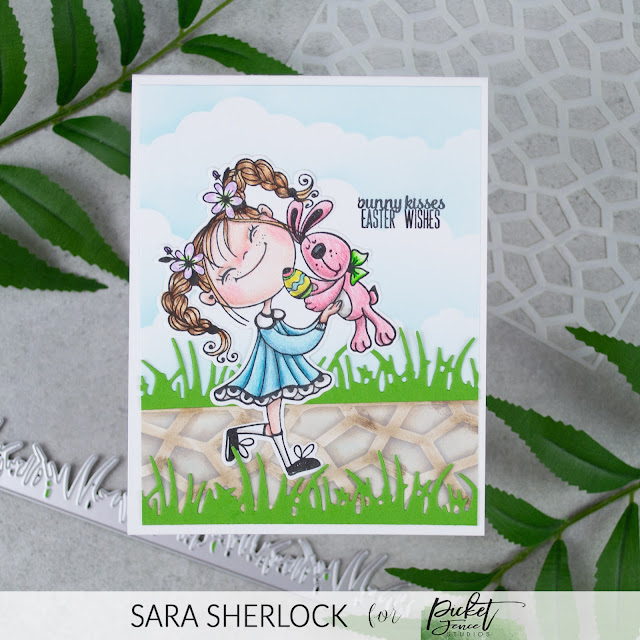
I have two cards to share with you below, along with tips on how the card was created.  All of the supplies used in the cards are listed at the bottom of the post.  For additional samples throughout the month, please follow my Instagram.  
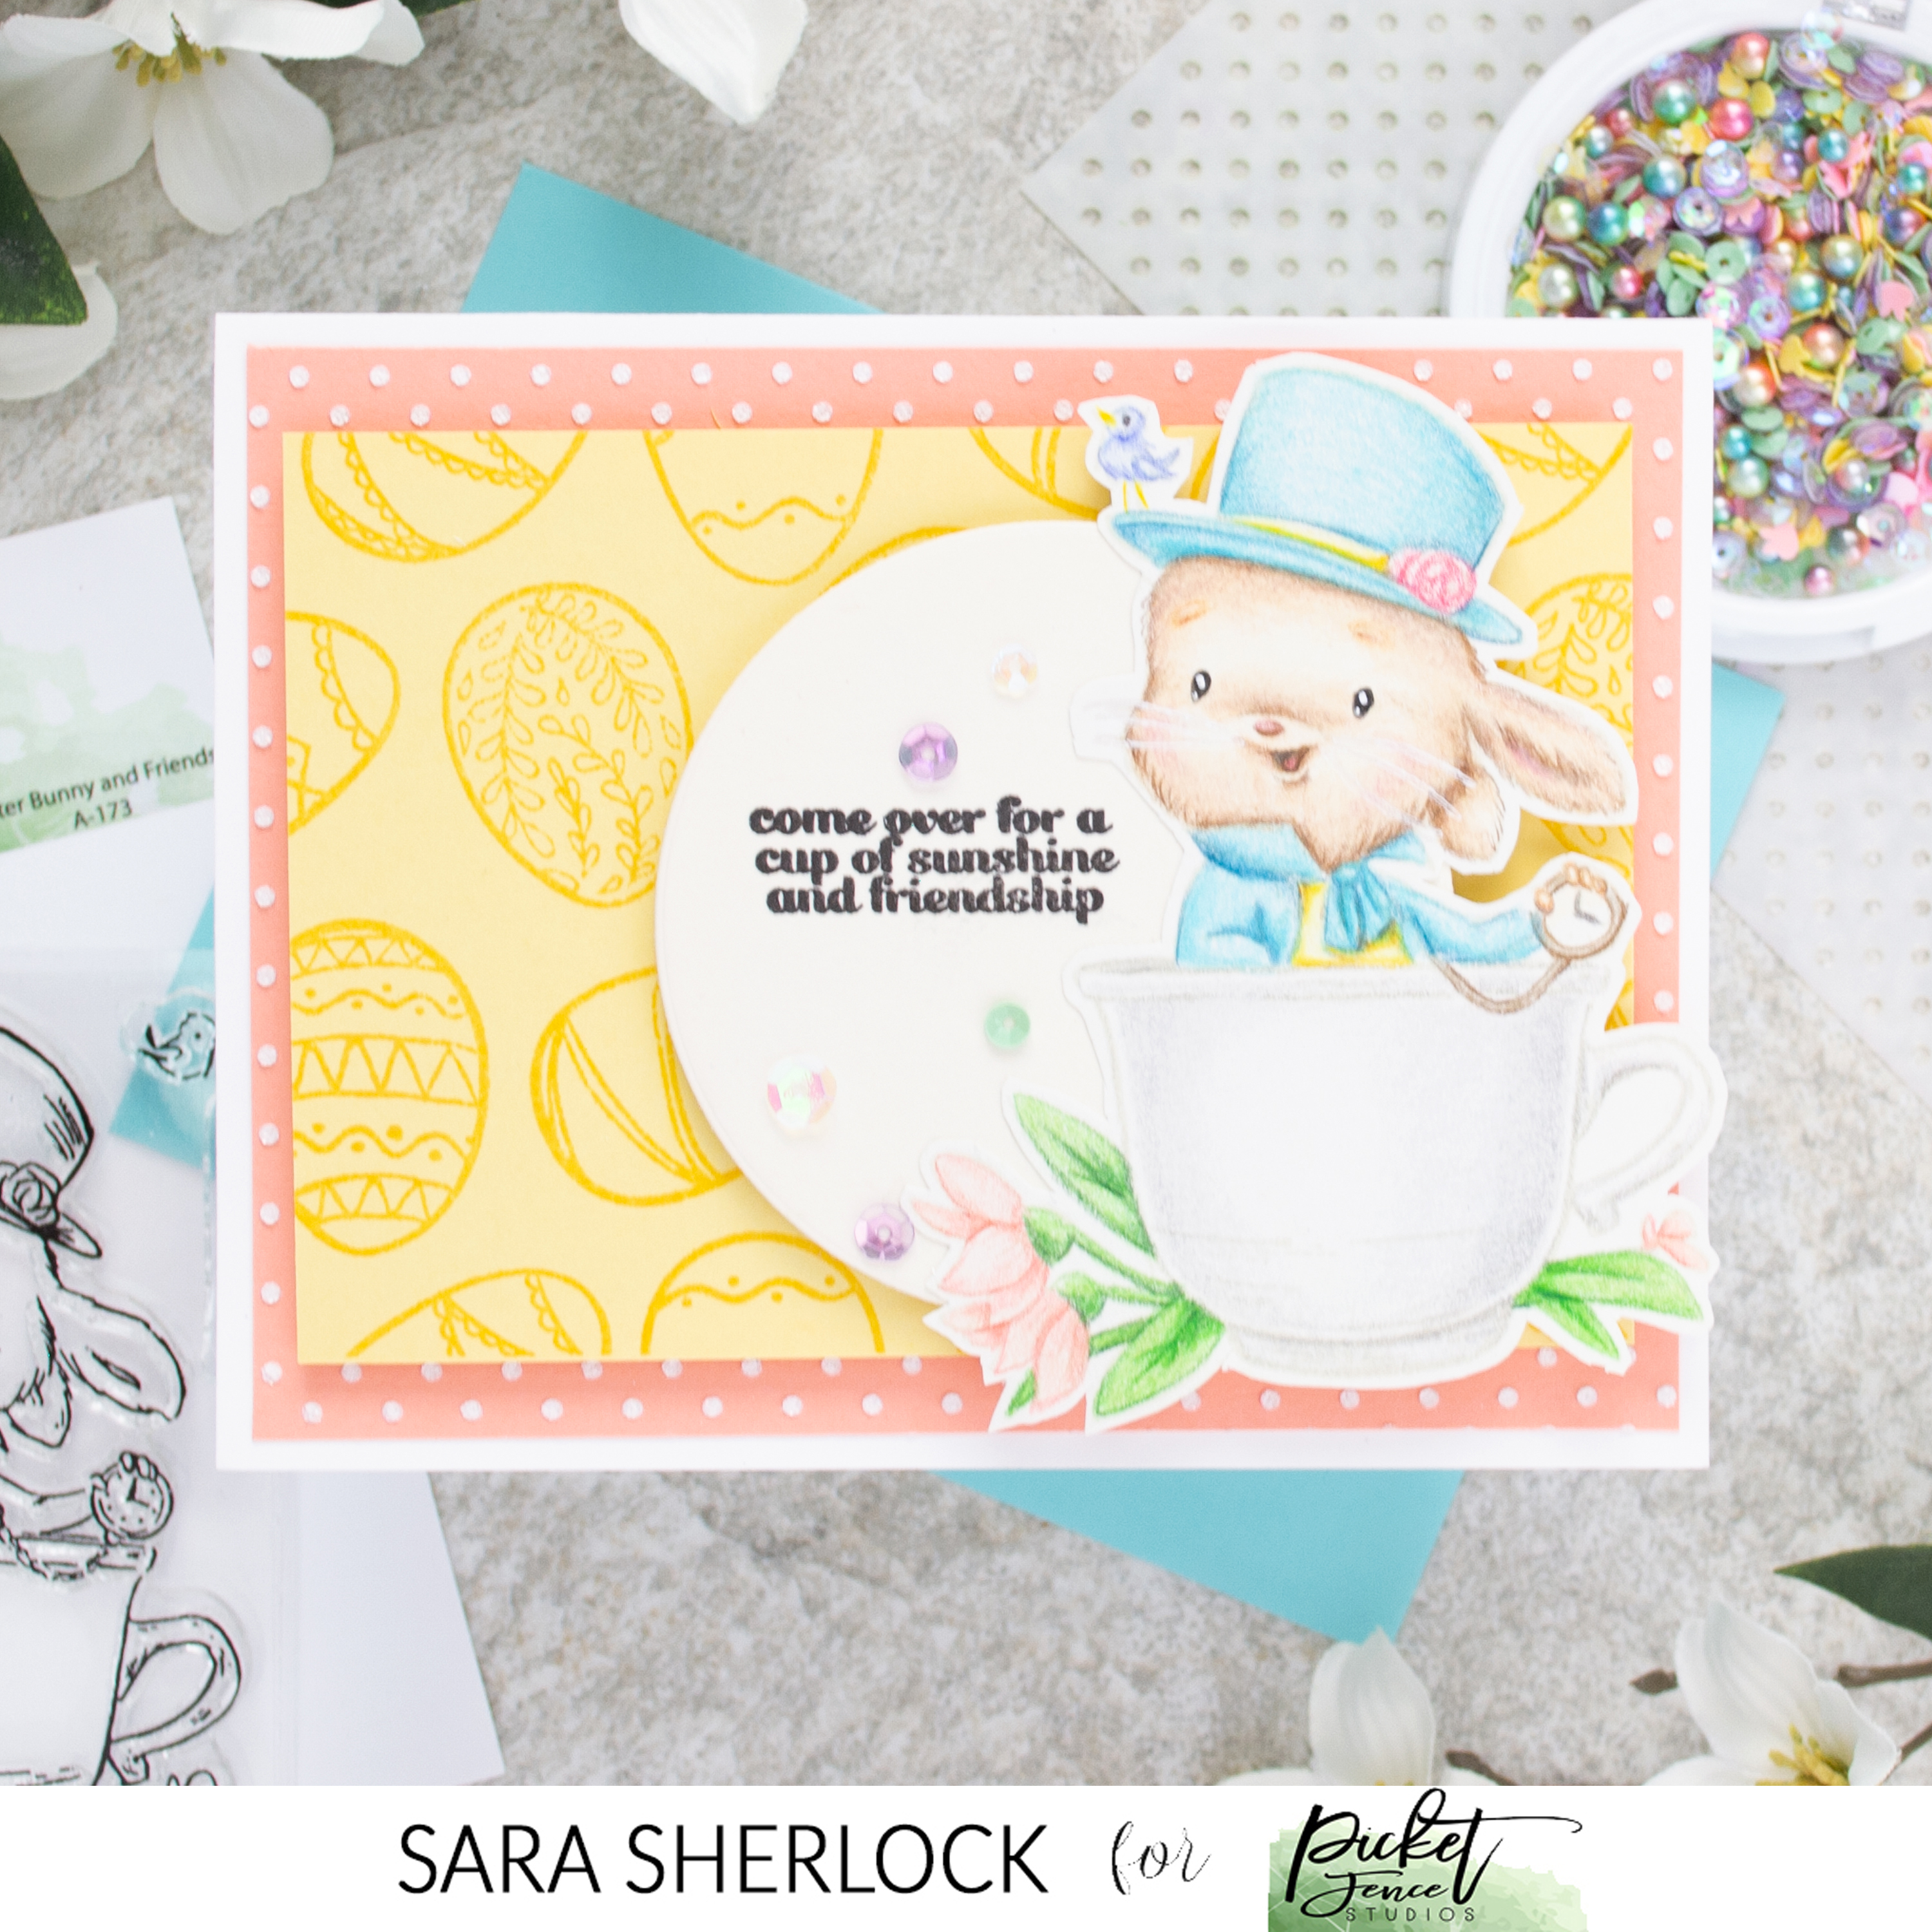


Be sure to check out the entire release, either above, or on the Picket Fence Studios website.  There will be bundles listed in the shop, where you can save a bit by purchasing some products together.  Or, you can purchase the entire release at a 15% discount!

Thanks for stopping by!


Supplies Used:

Use this easy list to find the products I used in my projects. (Contains affiliate links - where I earn a commission from purchases made from my links, at no cost to you. Your support helps me keep this blog going, and continue to create - Thank you! Affiliates and disclosures can be found here.) Please note, when possible, I try to offer multiple sources for the items I use.

If the supply list below is not visible in your browser, please click here to view it.
Wednesday, March 2, 2022

Instagram Hopping featuring Glassboard Studios

Hello!

Over on Instagram today, members of the Picket Fence Studios Design Team, are hopping along featuring their Glass Craft Mats from Glassboard Studio.  As part of that hop, a glass mat will be given away to a lucky (US Based Shipping Address) commenter.  I encourage you to go check it out!  Glassboard Studio has offered our followers a coupon code for 20% across their website - just enter PFS20 at checkout.


Glassboard Studio started out selling whiteboards, using glass instead of standard materials. It didn’t take long to realize that they were still super boring. The
CEO, Bill, decided to find a way to print beautiful images on the back of these boards.
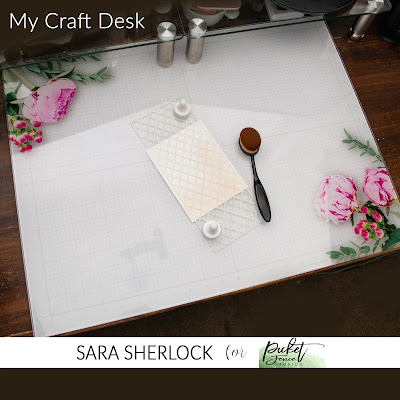
Glass surfaces are perfect for crafting and mixed media art. They are quick and easy to clean, heat resistant, and do not stain. The glass craft mat features a grid for easy alignment in 1-inch and 1/4-inch increments, 1/8-inch tick marks along the border and center lines, and diagonal lines at 30, 45, and 60 degrees. An option to add metal backing to create a magnetic surface is an added bonus as rare earth magnets can hold paper, cardstock, stencils, fabric, and more in place.


Let's be real. I'm a complete klutz. I drop my phone, brushes, ink pads, and sometimes larger tools - I get ink, glue, and Paper Glaze EVERYWHERE when I create (It's a nightmare to keep the computer monitor that's on my desk clean!).  I absolutely adore my Glass Craft Mat for it's durability. It's so easy to clean with a little plastic scraper for globby stuff, and glass cleaner for the smudgy stuff. And after multiple oopsies, there's not a scratch or ding on it! I chose the floral mat, and, because I have a larger desk, I chose one of the larger sized mats to make certain I had plenty of room to work on. I love it!  


For my card, I used the magnets with my Glass Craft Mat to hold my Slimline Plaid One Stencil in place.  I blended my ink through with a Life Changing Blending Brush.   Once the ink was at the level I wanted, I cleaned off my stencil, then used the edge as a guide to draw lines into the plaid pattern with a couple of Polychromos pencils.  (The teal color running through the center of the ink blended areas, and the yellow running through the white areas.)

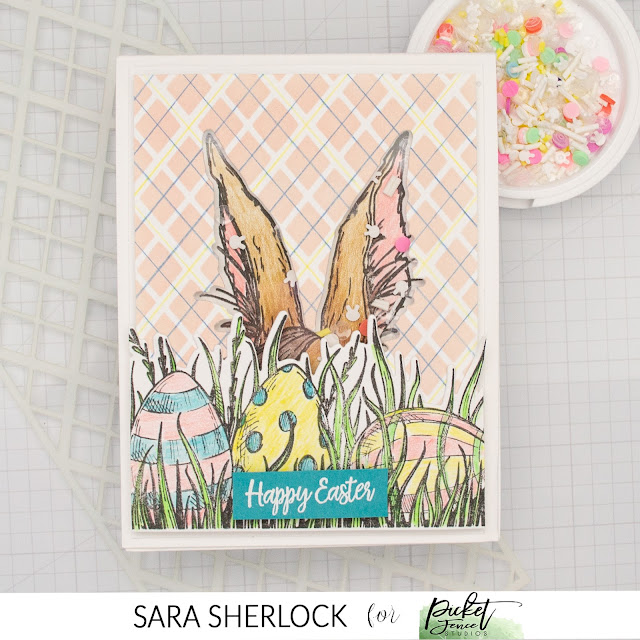
Once my patterned panel was how I wanted, I trimmed it down to card front size.  I used the grass die from the Hippity Hoppity to All Coordinating Die Set as a guide for where to place the bunny ears die, so that the bottom would be covered.  Then I taped the die in place, and die cut the ears.  I pulled out my MISTI, and laid my card front over a white piece of card stock.  I used the die cut space to line up my bunny ears stamp from the Hippity Hoppity to All Stamp Set.  Once the stamp was in place on the door of the MISTI, I removed the plaid panel, and stamped the ears in Black Hybrid Ink.  I also stamped a separate piece of white cardstock with the grass and eggs image.  


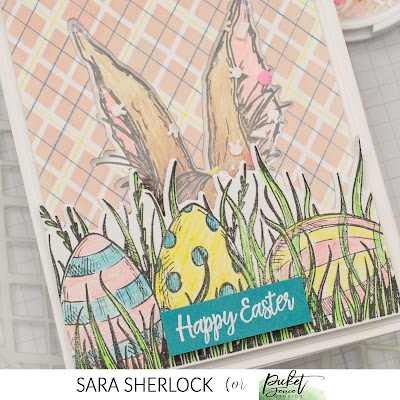
I colored in my images, then die cut the grass.  I added a piece of clear acetate to the back of the plaid panel, then I adhered the grass die cut to the front, trimming the bit of overhang on the sides.  I added foam to the back, to create the cushion that allowed me to add a pinch of Peter Cotton Tail Sequin Mix Plus.  Because I needed to line this up exactly, over my stamped and colored bunny ears, I added the sequins to the center of the image, and carefully placed the plaid panel over the top.  

I finished the card by white heat embossing the sentiment onto some teal paper, and popping that up with more foam.  The card front was adhered to a white card base.  

Be sure to head over to Instagram to join us on the Hop today!

Thanks for stopping by!


Supplies specific to this card, are listed, and linked, in the blog post.  
To see the basic tools that I use on nearly every card, please click here.

data-pin-description="[your pin caption goes here]" data-pin-url="[URL FOR BLOG POST GOES HERE]"

Monday, February 21, 2022

Picket Fence Studios February Release (Part 2)

Hello!

Today I'm sharing more cards I created, using the Picket Fence Studios February Release.  

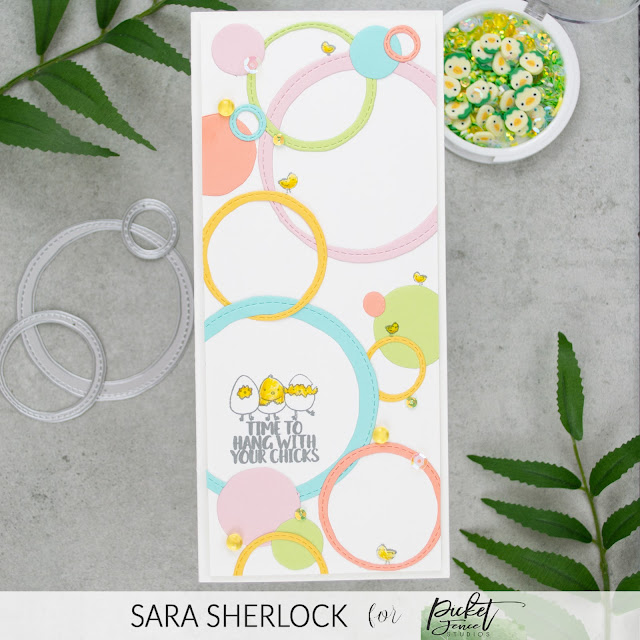
Card #1 | Hang with Your Chicks

For this card, I die cut numerous circles using the Misshapen Stitched Circle Dies.  I laid them out in the pattern I wanted, and then adhered them on a white card front.  I trimmed the edges of the circles, that overlapped the card front.  


I used a gray ink, to stamp my sentiment, along with several little chicks, from the Eastertime Stamp Set.  I colored in the chicks with a yellow pencil.  


I adhered the card front to a white card base, and added a few scattered Penny and Henny Sequin Mix Plus pieces to finish off the card.  

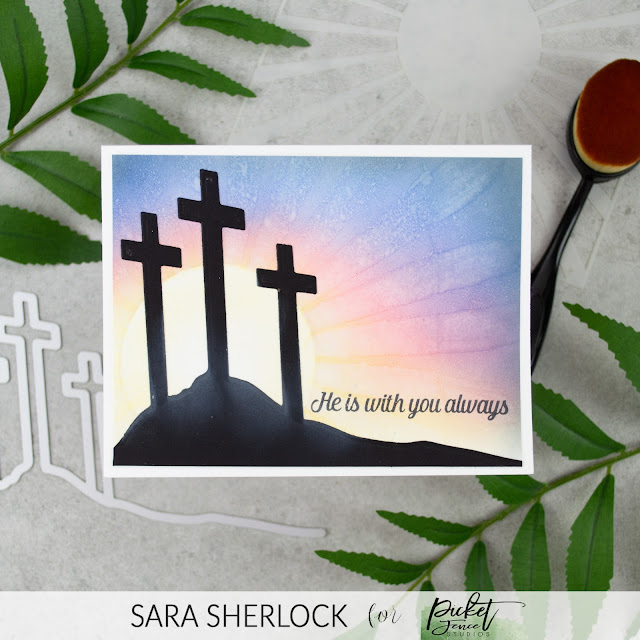
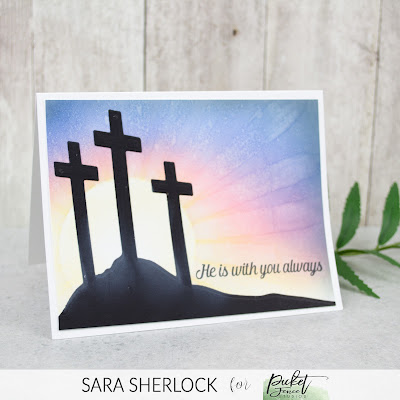
Card #2 | He is With You

This card started by die cutting the Three Crosses of Calvary Die from black card stock.  I used the die as a guide to line up where I wanted the stencils to be placed.  


I started my ink blending using the Blending 2.5" Circle Stencil  to create the sun behind the crosses.  Using my Life Changing Blending Brushes, I blended Scattered Straw, Festive Berries, Prize Ribbon, and Black Soot Distress Oxide Inks to create the sunset look.  Once my blend was how I wanted, I laid the Burst of Sun Stencil over the top of the card front, and sprayed a bit of water over it.  Then I used the Scattered Straw ink that was left on the brush to brush onto the die cut - to look as though the sun rays were coming between the crosses.  


I finished off the card, by stamping the sentiment from the Every Good and Perfect Gift Stamp Set, and then adhering the card front to a white card base.  


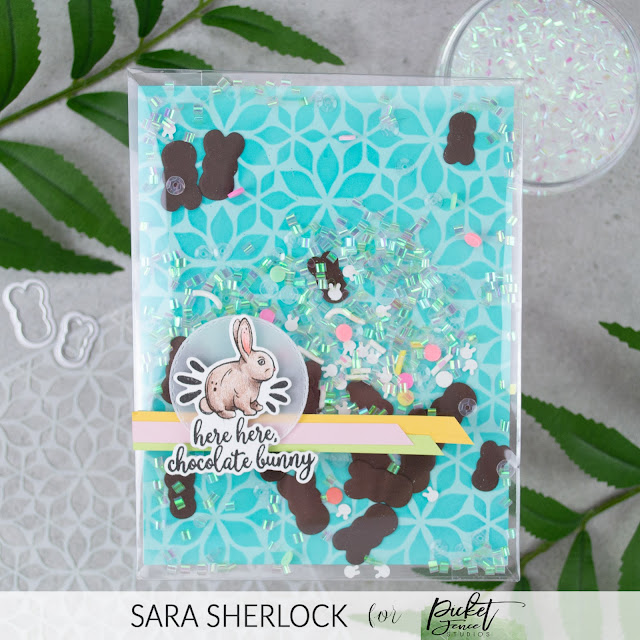
Card #3 | Chocolate Bunnies

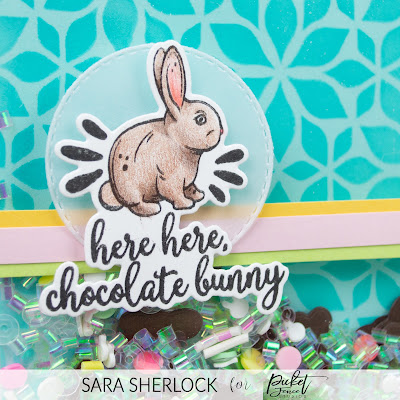
As soon as I saw the little Peep candy shaped dies in the Eastertime Coordinating Die Set, I knew I needed to do this shaker card.  

I inked the Lots of Blossoms Stencil onto a piece of card stock, to create my card front.  I then die cut a piece of acetate with the  A2 Full Front Shaker Die.  I wrapped that around my card front, and adhered the bottom and sides.  Inside the shaker, I added the die cut bunnies, some of the Peter Cottontail Sequin Mix Plus, and some of the Iridescent Clear Shaker Garnish.  Then I sealed the top of the shaker.  

I stamped and colored in the bunny sentiment from the Eastertime Stamp Set, and then die cut it using the Coordinating Dies.  I layered that onto the front of the shaker along with a vellum circle, and some angle cut banners.  


I finished by adding the shaker card front, to a white card base.  

That's it for today.  Which was your favorite card?  

Thanks for stopping by!


Supplies specific to this card, are listed, and linked, in the blog post.  
To see the basic tools that I use on nearly every card, please click here.

data-pin-description="[your pin caption goes here]" data-pin-url="[URL FOR BLOG POST GOES HERE]"

Monday, February 14, 2022

Picket Fence Studios February Release (Part 1)

Hello!

It's the 14th of the month, and that means it is time for another new release from Picket Fence Studios!  There's a whole bunch of new products this month, and many are Easter themed.  Though my favorite of favorite new products this month are the GIANT extra wide foam rolls!  They are available in true white, or black, and you can also get sheets that are perfectly cut to size for card fronts.  

Find the full release in the shop now.  

As always, I have multiple cards to share with you today, so lets get right on into it!  

Card #1 | Easter Wishes

For this first card, I used the new Bunny Dear Stamp Set, along with the coordinating die.  I colored her in with my Polychromos pencils.  


Once my image was done, I created the background with the new Cobblestone 6x6 stencil, the Slim Line Cloud Coverage Stencil, and my Life Changing Blender Brushes. Once the background was inked, I lined the edges with grass cut with the Slim Line Short Grass Die.  I stamped the sentiment with Black Hybrid Ink.  


Everything was then adhered together and put on a white card base.  


Card #2 | Bunnies & Chocolate

This little treat box was super fun to make.  I started out by stamping and coloring in the Hoppin' Down the Bunny Trail Stamp Set.  Then I colored it in with my Polychromos pencils.  I die cut the image with the coordinating die, and then set it aside.  


I created the box, by cutting a piece of card stock to 7" wide by 4.25" tall.  I scored it at 0.5", 1.25", 3.75" and 4.5" along the width, and once more at 0.75" on the height.  Then I cut the small tabs apart on the last score to create the bottom of the box.  I taped off the tabs, and used the Slim Line Flowers and Polka Dot Fun Stencil, to create a pattern on the box.  Then I die cut an oval from the panel that would be the front of the box.  I backed that with acetate.  Then, I die cut two pieces of paper lace, using the A2 Lattice Oval and Trimmings Die Set.  These wrapped perfectly around the top of the box.  


I stamped the little "chocolate enclosed" sentiment, and adhered the bunny ears, before assembling the box.  The 0.75" depth was perfect for some mini Cadbury eggs, or even a smaller chocolate bunny.  


Card #3 | Taurus Girl

This card began by stamping the new Taurus Girl Stamp in a light ink, and then I colored it in with my Polychromos pencils.  Once the coloring was completed, I die cut the image with the coordinating die.  


The background was created, by layering the new Slim Line Cobblestone Stencil over kraft card stock.  I first dry embossed the stencil, so that the stones sat a bit higher, then I inked the stencil with the Life Changing Blender Brushes.  Then I removed the stencil, and used one of the finer brushes to ink in the mossy areas.  I die cut a vellum circle to put behind the image, and then copper heat embossed the sentiment onto a strip of card stock, which I then added small strips of green card stock to the edges, to give it a little separation.  


The completed card front was then attached to a white card base.  


And that's it for today.  Be sure to stop by next week, when I'll be showcasing an additional three cards I made with today's release.  Again, you can find the full release in the shop now.

Thanks for stopping by!


Supplies specific to this card, are listed, and linked, in the blog post.  
To see the basic tools that I use on nearly every card, please click here.

data-pin-description="[your pin caption goes here]" data-pin-url="[URL FOR BLOG POST GOES HERE]"


Tuesday, March 3, 2020

Bunny Wagon | Paper Nest Dolls Guest Design

Hello!

A little bit ago, I was contacted by Christine Young, of Paper Nest Dolls, to see if I would be open to doing a guest design spot.  Her images are adorable, and of course I said YES!  I was excited to go back to my roots for a bit and work with a digistamp as well.  If you don't know what a digistamp is, it's a digital file of an image, you can then print and color to add to your cards.  Digistamps are very flexible in terms of the card size you create - as you can resize them to what you need - and they are digital, so storage is just a few bytes on your computer.  

Handmade Card, Easter Card, DIY, Adult Coloring, Copic Markers, Prismacolor Pencils, Distress Ink Blending, Life Changing Blending Brush, Gingham stamp, Flannel Life Stamp, digistamp, Paper Nest Dolls, Bunny Wagon, Girl with bunnies, bunny girl, Easter bunnies, spring

 I chose the brand new, adorable, Bunny Wagon digistamp to use on the card today.  I printed the image out on Sweet Sentiment Premium Coloring paper, and colored it in using Copic Markers, and then Prismacolor Pencils.  Once I had the image colored, I fussy-cut it out.  For some of the more detailed areas, I used a retractable craft knife and a cutting mat to trim the excess away.

Handmade Card, Easter Card, DIY, Adult Coloring, Copic Markers, Prismacolor Pencils, Distress Ink Blending, Life Changing Blending Brush, Gingham stamp, Flannel Life Stamp, digistamp, Paper Nest Dolls, Bunny Wagon, Girl with bunnies, bunny girl, Easter bunnies, spring

Copic Colors Used:
E000, E11, E13, E35, E37, E50, E53, E57, YR20
R01,R20, R22
BV000, BV00, V09, V95
C1, C3, C5, C7, 0

Prismacolor Pencils Used:
Seashell Pink 1093, Ginger Root, 1084, Deco Peach 1013, Light Peach 927,
Nectar 1092, Peach Beige 1085, Blush Pink 928, Clay Rose 1017
Burnt Ochre 943, Chocolate 1082, Dark Umber 947
Eggshell 140, Parma Violet 1008
20% Warm Gray 1051, 50% Warm Gray 1054
30% Cool Gray 1061, 50% Cool Gray 1063, 90% Cool Gray 1067
70% French Gray 1074, 90% French Gray 1076
White 938, Black 935
Handmade Card, Easter Card, DIY, Adult Coloring, Copic Markers, Prismacolor Pencils, Distress Ink Blending, Life Changing Blending Brush, Gingham stamp, Flannel Life Stamp, digistamp, Paper Nest Dolls, Bunny Wagon, Girl with bunnies, bunny girl, Easter bunnies, spring

I ink blended a background for the image, using the Life-Changing Blender Brushes, and MFT's Cloud and Grassy Edges stencils. I created the clouds using Spun Sugar Distress Ink, and the grass using both Shabby Shutters, and Mowed Lawn Distress Inks.

To create the framing for the card front, I stamped the Flannel Life Background Stamp, onto a piece of Pretty Amethyst card stock, using Whip Cream ink.  I carefully trimmed out the center, and then topped it with a piece of white card stock cut with the MFT Stitched Rectangle Scalloped Frame dies. The frame was attached over the inked panel using foam tape, and then  the image was attached inside with more foam tape. 

Handmade Card, Easter Card, DIY, Adult Coloring, Copic Markers, Prismacolor Pencils, Distress Ink Blending, Life Changing Blending Brush, Gingham stamp, Flannel Life Stamp, digistamp, Paper Nest Dolls, Bunny Wagon, Girl with bunnies, bunny girl, Easter bunnies, spring

The entire card front was adhered to a top-folding card base, made from white card stock.

And that's the super cute Easter card, created using the Bunny Wagon digistamp from Paper Nest Dolls

Thanks for stopping by!


Supplies Used**:
Use this easy list to find the products I used in my projects. (Contains affiliate links - where I earn a commission from purchases made from my links, at no cost to you. Your support helps me keep this blog going, and continue to create - Thank you! Affiliates and disclosures can be found here.) Please note, when possible, I try to offer multiple sources for the items I use. Products with two or more logos - underneath, or on the side, give you options of where to purchase, in case the item has sold out at one shop. To visit the first store, click on the photo of the item. To visit the second (or greater) source, click the logo for the second shop - you will still be taken directly to the product. 
**If a particular item I used was out of stock when I was preparing my post, or the item I used was discontinued, I have provided a link to a similar item - that is available - when a substitution would not affect the card design.


Monday, March 26, 2018

Hoppy Easter | No Line Coloring Technique

I love no line coloring.  It's such a pretty technique - particularly when done in pencils on a kraft colored background.  The softness of the pencils just pops with the kraft.

Cute Easter card featuring the Love Bunny ATS stamp from Fun Stampers Journey.  Image was colored using a no line technique on kraft colored card stock.  Pretty pastels from the Spring Filled Prints papers complement the Easter image.

For today's card, I used the Love Bunny ATS stamp.  Now, it's getting awful close to Easter, however, the main image in the stamp does not have to be paired with the Easter sentiment.  This image would work just as well as a spring card. 

Cute Easter card featuring the Love Bunny ATS stamp from Fun Stampers Journey.  Image was colored using a no line technique on kraft colored card stock.  Pretty pastels from the Spring Filled Prints papers complement the Easter image.

To Recreate this card:

  • Stamp the image in Oatmeal Cookie ink on a piece of Oatmeal Cookie Card Stock
  • Color in with the Color Burst Pencils
  • Stamp and heat emboss the sentiment to the left of the image
  • Add a strip of Spring Filled Prints Pool Party plaid to the bottom of the kraft 
  • Mat the card front on a piece of Pineapple Smoothie Card Stock
  • Wrap a bit of Bubble Gum Satin Ribbon around the matted card front, and tie into a knot
  • Adhere onto a Whip Cream card base.  
  • Attach scattered pearls for interest

Cute Easter card featuring the Love Bunny ATS stamp from Fun Stampers Journey.  Image was colored using a no line technique on kraft colored card stock.  Pretty pastels from the Spring Filled Prints papers complement the Easter image.

Don't forget that when you purchase the Color Burst Pencils from me in March, you can get the Blooms in Boots stamp as your FREE Bloom Benefit, PLUS you get a coloring video tutorial showing you how I colored the image shown below.  Including tips and techniques to help you blend with only the pencils.  


Hit the Easy Button below if you want to order the pencils and Bloom in Boots now!
Tax and Shipping included

Thanks for stopping by!


Much love,                                                                             


Fun Stampers Journey Supplies Used:

Stamps: Love Bunny AT-0271

Inks: Oatmeal Cookie True Color Fusion Ink IP-0011, Clear Pigment Ink IP-0102, Journey Gold Embossing Powder IP-0101

Papers: Whip Cream 8.5" x 11" Card Stock CS-0040, Oatmeal Cookie 8.5" x 11" Card Stock CS-0023, Pineapple Smoothie 8.5" x 11" Card Stock CS-0026, Spring Filled Prints PP-0051

Embellishments: .Bubble Gum Satin Ribbon AC-0105, Pearls AC-0024

Tools: Journey Color Burst Pencils JM-0077,  Journey Blooms Paper Trimmer TO-0039, Crease Tool TO-0040, Detail Pro Shears (4.5") TO-0063, Hear Gun TO-0083

Adhesives: Easy Glide Permanent Adhesive Runner AD-0081

Friday, March 16, 2018

He is Risen Easter Card | Leadership Conference Display

It's Friday!  It's Friday!  And that means that it's time for another card from my Leadership Conference Display.  We're coming to the end of this series - as well as the Bloom This Way catalog.  Did you get your favorites from this catalog? 

This simple Easter Card features the Easter Blessings and Hope Anchors stamp sets from Fun Stampers Journey.

Today's card is super simple, however, I do think that is entirely appropriate for this card.  The background is simply embossed, the cloud patterned paper strip highlights the cards emphasis, in the form of the the cross stamp, and gold embossed sentiments. 

This simple Easter Card features the Easter Blessings and Hope Anchors stamp sets from Fun Stampers Journey.

Thanks for stopping by!

Much love,                                                                             


Fun Stampers Journey Supplies Used:

Stamps: Easter Blessings Stamp Set  SS-0545, Hope Anchors Stamp Set SS-0546

Inks: Hazelnut Blend True Color Fusion Ink IP-0012,  Clear Pigment Ink Pad IP-0102, Journey Gold Embossing Powder IP-0101

Papers: Whip Cream 8.5" x 11" Card Stock CS-0040, Oatmeal Cookie 8.5" x 11" Card Stock CS-0023, Spring Filled Prints PP-0051, Journey Vellum PP-0044

Embellishments: Journey Twine - Natural AC-0005

Tools: Easter Blessings Die Set DI-0401, Brocade Imprints Embossing Folder EF-0020 (Bloom Benefit), Journey Platinum Machine TO-0090,  Journey Blooms Paper Trimmer TO-0039, Crease Tool TO-0040, Detail Pro Shears (4.5") TO-0063

Adhesives: Journey Craft Glue AD-0111, Journey Foam Squares - Small AD-0084

Monday, March 12, 2018

Easter Mini Album/Card | Video

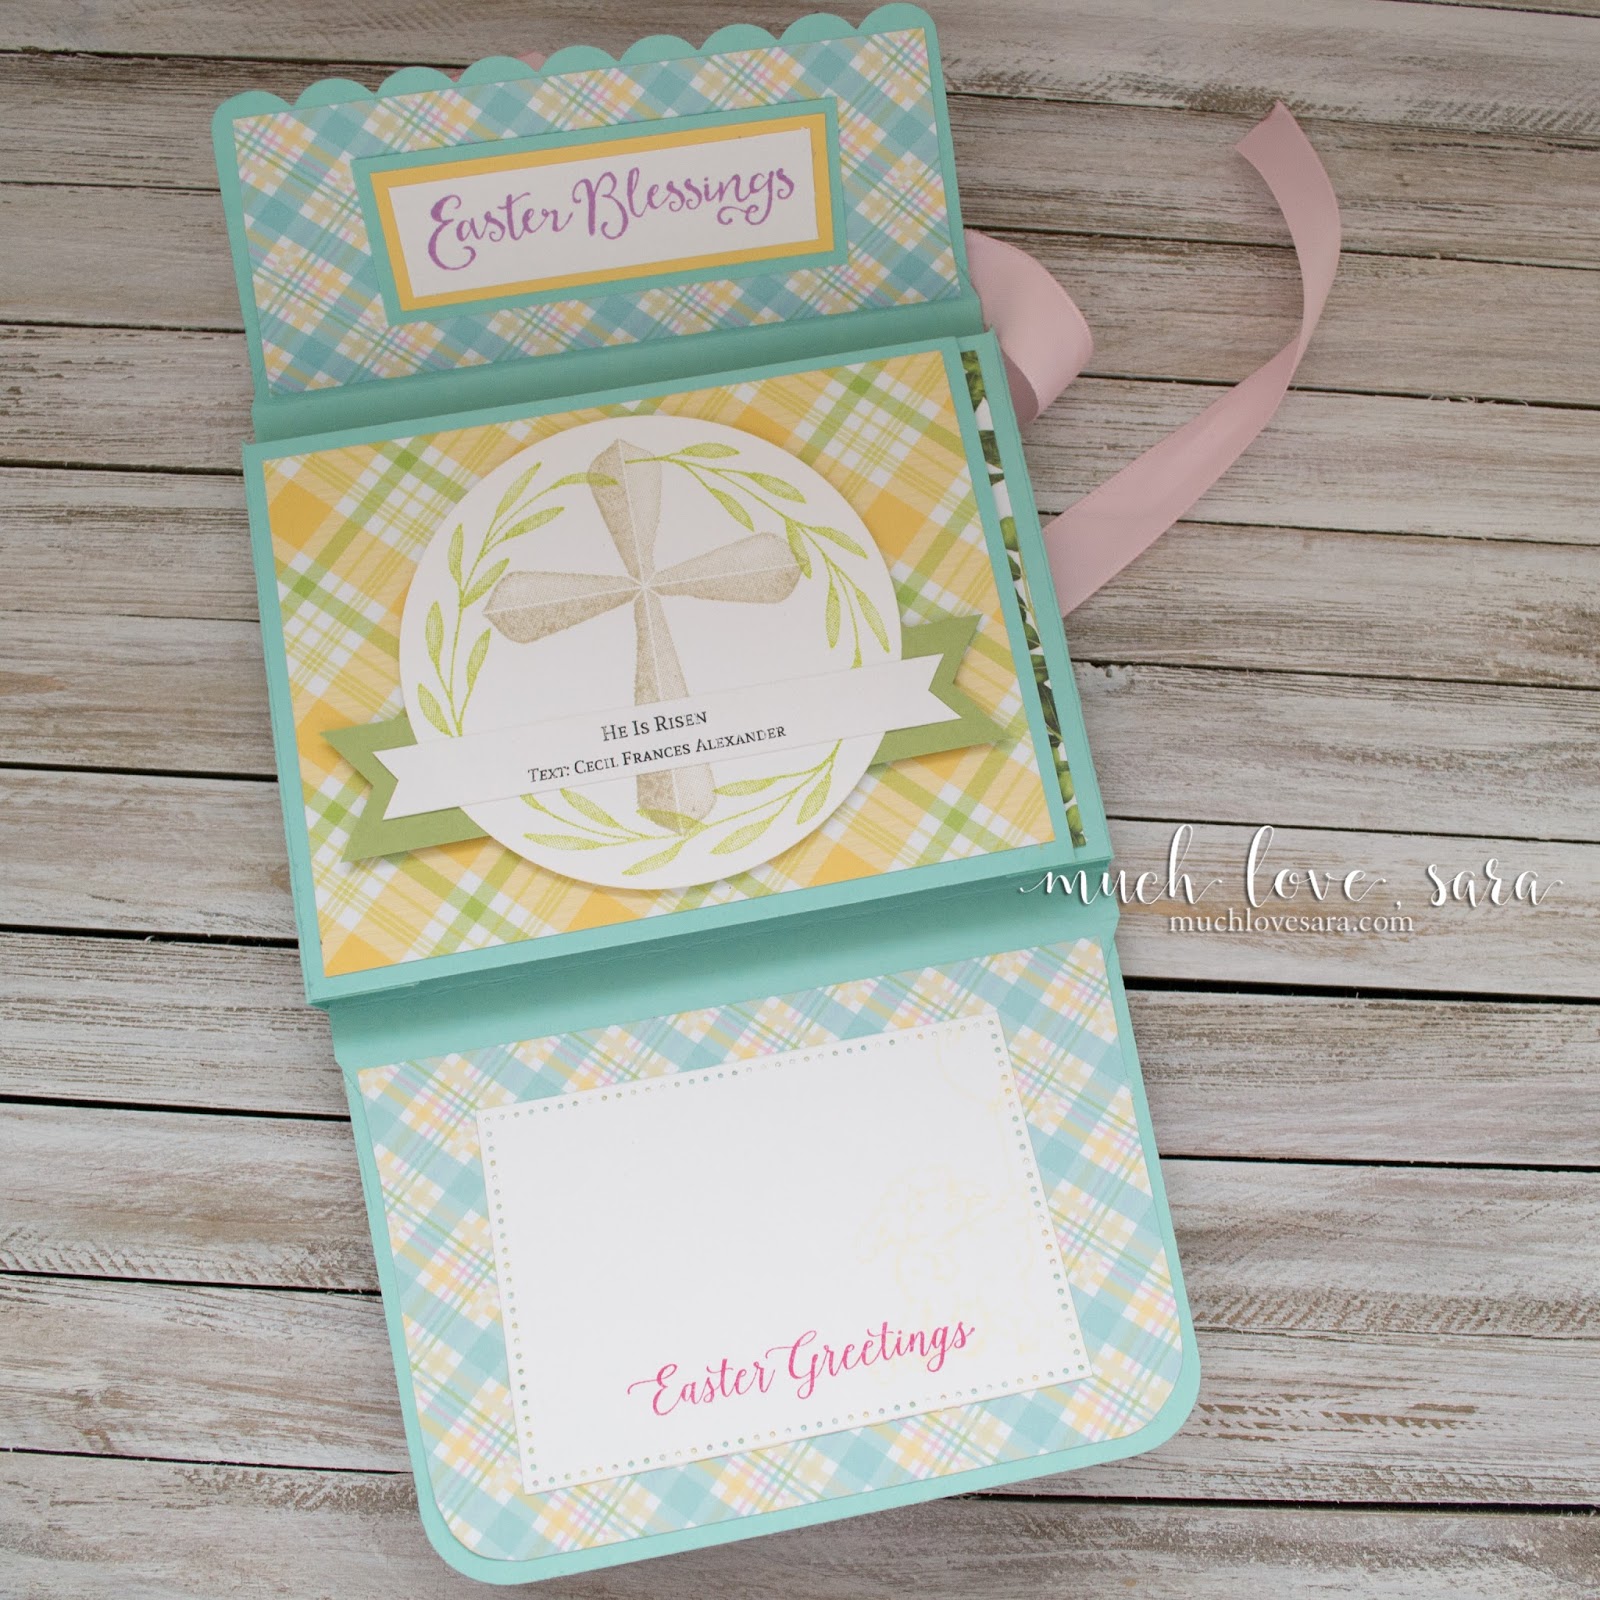
On Friday, I did a Facebook Live video showcasing the Envelo-Box die.  This die is in the Bloom This Way Catalog, and is a really fun addition to your craft supplies.  In addition to the standard Envelope Box (fits an embellished A2 sized card), you can used this die to create other fun things, like the little mini album/Easter card shown below. 

This simple and easy Easter Mini Album/Card, was created with the Envelo-Box Die.  A few simple adjustments to the basic die cut, creates the album base.  Video tutorial of how to assemble the Envelo-Box included.

I die cut the Envelo-Box from Cool Pool card stock, then added the additional "pages" to the side flaps.  I cut 4-1/4" by 5-1/2" pieces of card stock, and attached them with White Liner.

This simple and easy Easter Mini Album/Card, was created with the Envelo-Box Die.  A few simple adjustments to the basic die cut, creates the album base.  Video tutorial of how to assemble the Envelo-Box included.

The pages were decorated with Spring Filled Prints papers, Easter Blessings Stamps, and Hope Anchors stamps.

This simple and easy Easter Mini Album/Card, was created with the Envelo-Box Die.  A few simple adjustments to the basic die cut, creates the album base.  Video tutorial of how to assemble the Envelo-Box included.

I had printed off the lyrics of the hymn I started humming every time I picked up the Hope Anchors stamps, onto Whip Cream card stock.

This simple and easy Easter Mini Album/Card, was created with the Envelo-Box Die.  A few simple adjustments to the basic die cut, creates the album base.  Video tutorial of how to assemble the Envelo-Box included.

Want to change it up?  If you wanted, you could easily put photos in place of the panels with the hymn verses.  Imagine this as a Wedding Invitation, with the invitation in the center, surrounded with engagement photos!  Or even a baby announcement, with photos from a maternity shoot, as well as ultrasound photos - with a photo of the new little one in the center.  

This simple and easy Easter Mini Album/Card, was created with the Envelo-Box Die.  A few simple adjustments to the basic die cut, creates the album base.  Video tutorial of how to assemble the Envelo-Box included.

The bottom panel of the box was left to write a sentiment to the recipient.  

This simple and easy Easter Mini Album/Card, was created with the Envelo-Box Die.  A few simple adjustments to the basic die cut, creates the album base.  Video tutorial of how to assemble the Envelo-Box included.

If you missed the Live Video, I've included it below.  


Thanks for stopping by!


Much love,                                                                             


Fun Stampers Journey Supplies Used:


Stamps: Easter Blessings Stamp Set  SS-0545, Hope Anchors Stamp Set SS-0546, Storybook Occasions Stamp Set SS-0538


Inks: Hazelnut Blend True Color Fusion Ink IP-0012, Lemon Drop True Color Fusion Ink IP-0043, Lemon Grass True Color Fusion Ink IP-0022, Kiwi Slice True Color Fusion Ink IP-0024, Summer Days True Color Fusion Ink IP-0042, Sweet Berry True Color Fusion Ink IP-0029, Pretty Amethyst True Color Fusion Ink IP-0018, Clear Pigment Ink Pad IP-0102, Journey Gold Embossing Powder IP-0101

Papers: Whip Cream 8.5" x 11" Card Stock CS-0040, Watermelon Fusion 8.5" x 11" Card Stock CS-0039, Cool Pool 8.5" x 11" Card Stock CS-0118, Lemongrass 8.5" x 11" Card Stock CS-0019, Pineapple Smoothie 8.5" x 11" Card Stock CS-0026, Journey Vellum PP-0044, Spring Filled Prints PP-0051

Embellishments:
Pearls AC-0024, Satin Ribbon Bubble Gum AC-0105

Tools: Envelo-Box Die DI-0399, Easter Blessings Die Set DI-0401, Journey Circles Die Set DI-0039, Journey Ovals Die Set DI-0042, Journey Rectangles Die Set DI-0041, Doily Die DI-0105,  Brocade Imprints Embossing Folder EF-0020 (Bloom Benefit), Stained Glass - Stencil JM-0008, Journey Platinum Machine TO-0090,  Journey Blooms Paper Trimmer TO-0039, Crease Tool TO-0040, Detail Pro Shears (4.5") TO-0063

Adhesives: .White Liner AD-0001, Journey Foam Squares - Medium AD-0085, Journey Craft Glue AD-0111