
Hello!

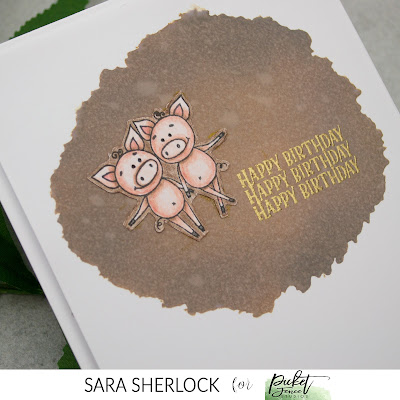
For the simple background, I ink blended Gathered Twigs and Walnut Stain Distress Oxide Inks through one of the openings of the Water Coloring Scene Building Stencil, using a Life Change Blender Brush. I sprinkled just a bit of water on that, and let it dry, before heat embossing the sentiment from the stamp set. Then I adhered the little piggies, and added the card front to a white card base.

I then adhered the card front to a white card base, using more of the foam.
Thanks for stopping by!


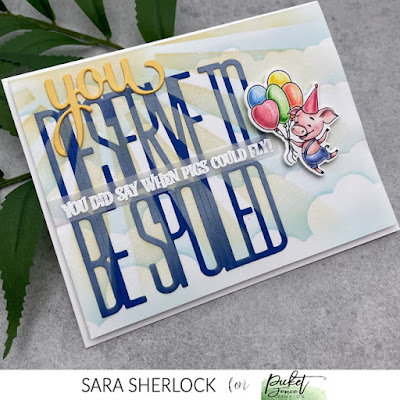
The second card again started with an adorable pig from the stamp set, stamped in Black Hybrid Ink, then colored them in with my Prismacolor pencils. I die cut the image with the coordinating die, then set it aside. Then, on a white panel, I inked in some clouds, using the Slim Line Cloud Coverage Stencil, and Tumbled Glass Distress Oxide Ink. I then set this background aside.

I die cut the new Slim Line You Deserve to be Spoiled Word Die from blue card stock, and the Hey You Word Die from yellow card stock. I added the "you" from the second die in place of the "you" on the first die, and adhered the sentiment to my background, wrapping the tail of the "y" around some of the letters, by cutting it apart, and gluing the ends underneath.
I then laid the Corner Sun Stencil so the sun was over the "you", and ink blended through that onto the background and die cut words, using Scattered Straw Distress Oxide Ink. I stamped and white heat embossed a sentiment from the stamp set onto vellum, and laid that over the die cut words, then adhered the pig with a bit of foam tape.

Thanks for stopping by!
Supplies specific to this card, are listed, and linked, in the blog post.
To see the basic tools that I use on nearly every card, please click here.
No comments:
Post a Comment
I love comments! If you have any feedback or questions, please feel free to leave them here!