
Hello!
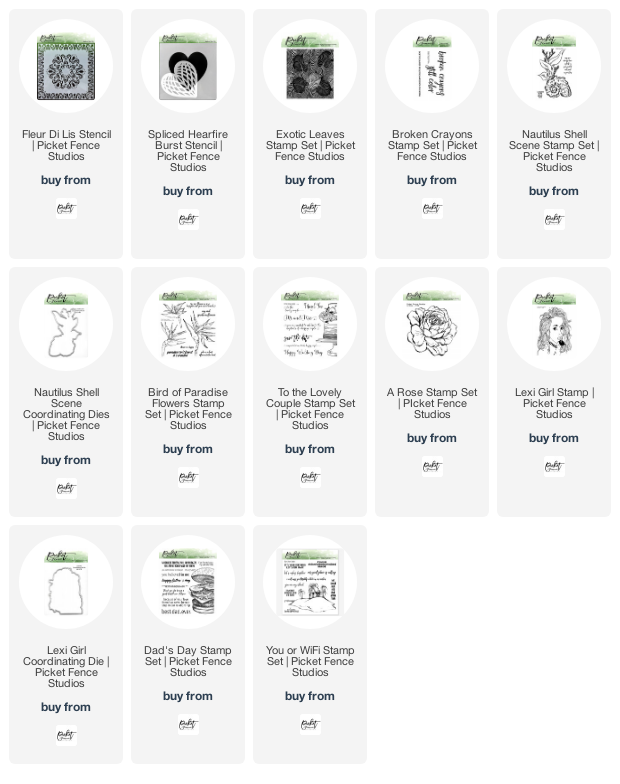
It's the 14th, which means it's time for a new release from Picket Fence Studios. If you like to color, there are so many fun new stamp sets this month I'm excited to share my samples with you. But, first, here is a quick peek of the entire release.
FULL MAY 2020 PICKET FENCE STUDIOS RELEASE:
As always, I have several cards to share with you, today, using these new products. All of the products used in these cards will be listed at the bottom of this post, for reference.
Card #1 | The Cheese to my Burger
I began this card, by stamping the hamburger from the Dad's Day Stamp Set, in Barely There Amalgam Ink, onto Sweet Sentiment Coloring Paper. I colored in the image using Prismacolor pencils and a white gel pen. Once finished, I trimmed the panel down, and set it aside.

I stamped, and white heat embossed, the sentiment from the stamp set, onto a strip of Pitch Black card stock. I also stamped a panel of white card stock with the Gingham Stamp, in Rich Coral Ink. Everything was layered together, and I tied a bit of Candy Apple Twine around the Gingham Panel, before adhering the card front to a white card base, using foam tape.
♥ ♥ ♥ ♥ ♥
Card #2 | Paradise Created
For this card, I stamped one of the flower images from the Bird of Paradise Flowers Stamp Set, Black Hybrid Ink, onto the Sweet Sentiment Coloring Paper. I colored the image in with my Prismacolor pencils, and then fussy cut the image out. I then, stamped a panel of Fresh Forest card stock, with the Exotic Leaves Stamp, using Fresh Forest Ink. I die cut that panel using a circle die.

To create the card background, I first lined everything up on a top folding white card base, in my MISTI. I stamped the sentiment, from the Birds of Paradise Flowers Stamp Set, in the black ink, and then sprinkled a little Gold Silk over the white card front. I layered on the leaves background, and floral image using foam tape.
♥ ♥ ♥ ♥ ♥
Card #3 | Gold & Gray Roses
I began this card, by repeatedly stamping the A Rose Stamp onto River Stone card stock in Versamark Ink. Then I heat embossed the roses in gold. I also stamped and gold heat embossed a sentiment from the Fancy Sentiments Stamp Set, onto Pitch Black card stock.

I fussy cut out the embossed roses, and laid them out on a card front cut from Pale Rose card stock. When I found the arrangement I liked, I adhered the roses down using a bit of liquid glue. Then I trimmed the overhanging pieces away. I used just a couple of gray Prismacolor pencils to add shading to the roses, before adhering the sentiment strip with foam tape. I matted the card front onto another piece of the Pitch Black card stock, before adding that to a white card base.. A few scattered Fashion Gold pieces finished the card.
♥ ♥ ♥ ♥ ♥
Card #4 | Seriously, No
This card began by stamping the Lexi Girl Stamp, in Barely There Amalgam Ink, onto coloring paper. I colored the image in using colored pencils, and used a white gel pen and black pen to add the final details. I cut the image out using the coordinating die, then set this aside.

The sentiment is from the Seriously, Literally Stamp Set. I stamped the "omg. no." in Black Hybrid Ink, by masking off the rest of the sentiment while inking my stamp. I then removed the mask to stamp onto white card stock. I cleaned the stamp, then masked off that portion, to stamp the rest of the sentiments in Candy Apple ink. Then I die cut the oval shape. I added my sentiment panel, and colored image to a Blue Lagoon card front, that I had embossed lines into for some detail. Then I attached the card front to a white card base.
♥ ♥ ♥ ♥ ♥
Card #5 | Shell in Your Pocket
This card is very quick. I stamped the image and sentiment from the Nautilus Shell Scene Stamp Set, in Black Hybrid Ink, onto a card front. Then, I colored in the image with Prismacolor pencils.
♥ ♥ ♥ ♥ ♥
Card #6 | Wedding Cake

♥ ♥ ♥ ♥ ♥
These new stamps are quite fun - and really gave my colored pencils a workout this month! I hope you've found some inspiration, and perhaps a few new stamps to add to your stash.
Thanks for stopping by!

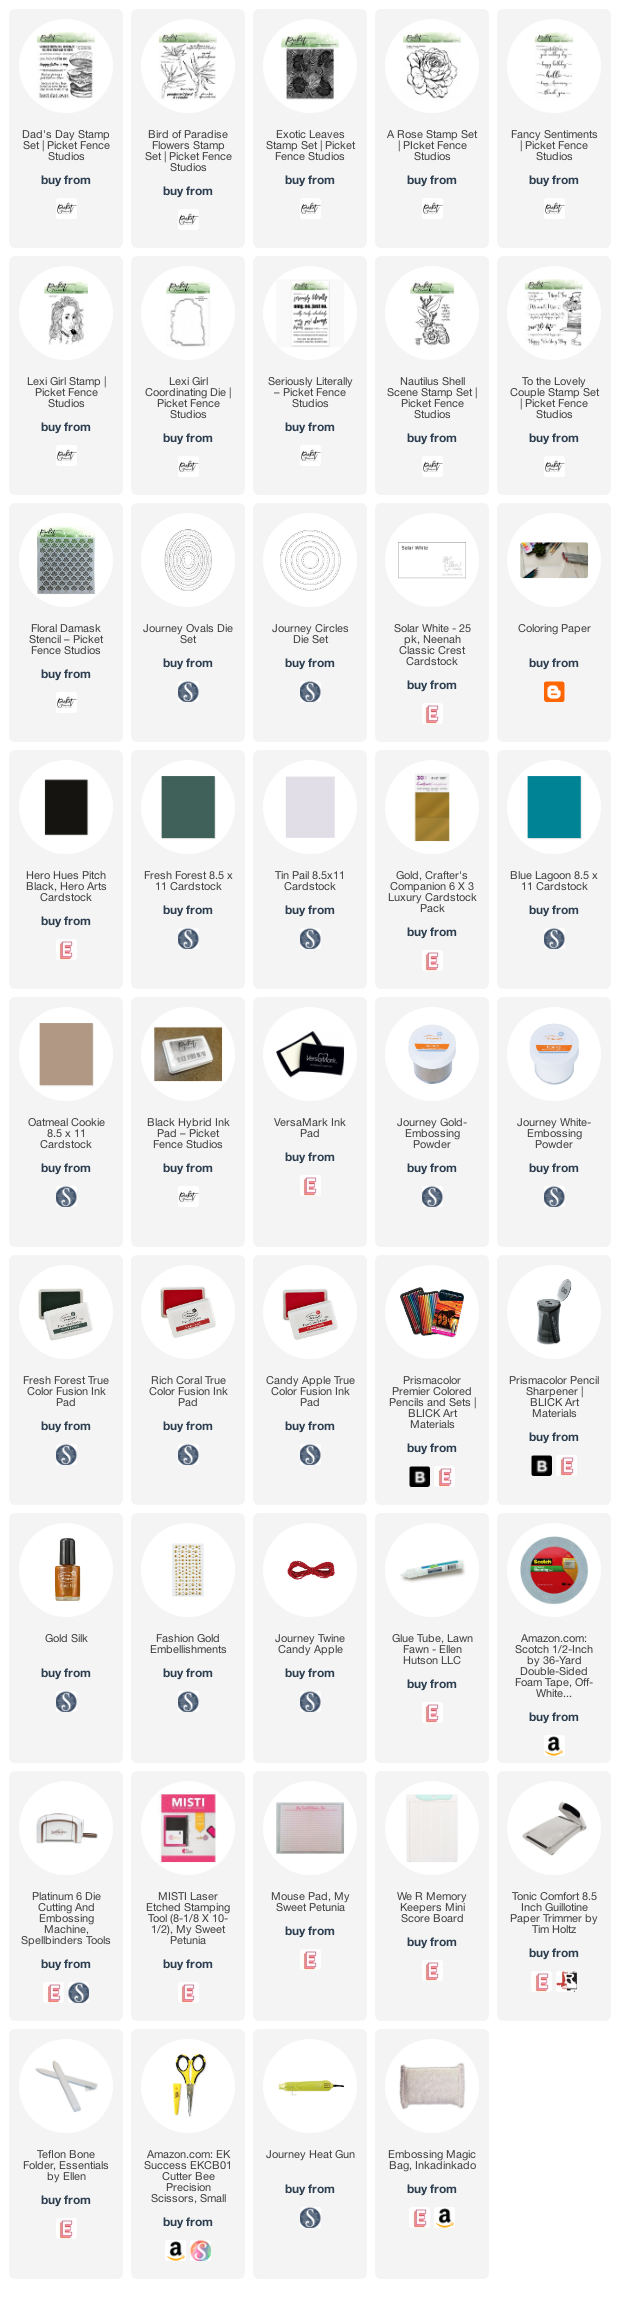
Use this easy list to find the products I used in my projects. (Contains affiliate links - where I earn a commission from purchases made from my links, at no cost to you. Your support helps me keep this blog going, and continue to create - Thank you! Affiliates and disclosures can be found here.)
Please note, when possible, I try to offer multiple sources for the items I use.
No comments:
Post a Comment
I love comments! If you have any feedback or questions, please feel free to leave them here!