Hello!
It's release day over at Picket Fence Studios, and that means that there are a BUNCH of new, fun, products that are now available. I have to tell you how excited I was when I opened up my package, and saw the theme of a lot of these stamps. Despite being very landlocked in Idaho, I love the ocean, and so this release has tons of items that I love - which shows, since my cards below are mostly oceanic in style. There are some non-ocean items in the release as well. And, as you'll see from the cards I created, there are lots of fun things to color.
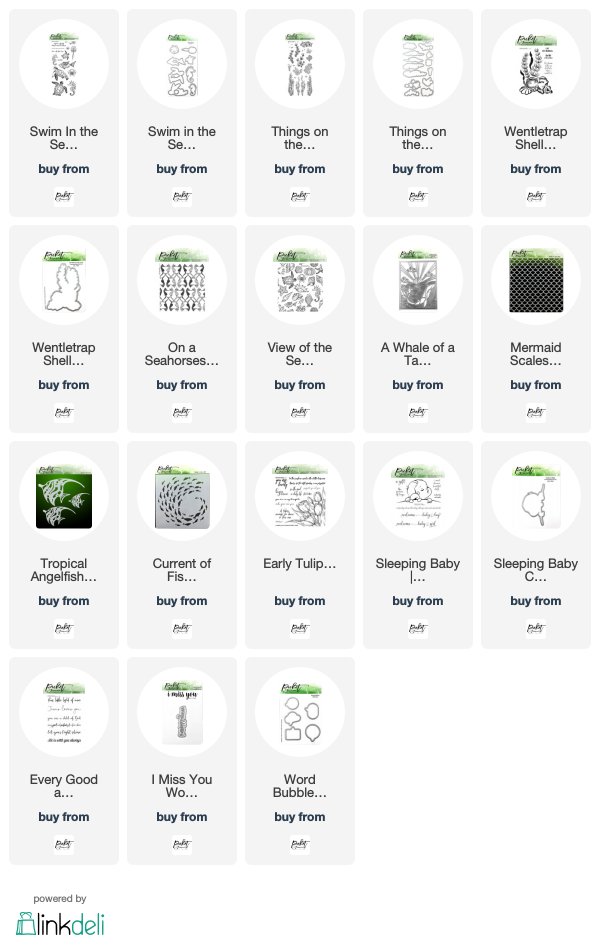
Full Picket Fence Studios March Release:

I have several cards to share with you, today, using these new products. All of the products used in these cards will be listed at the bottom of this post, for reference.
Card #1
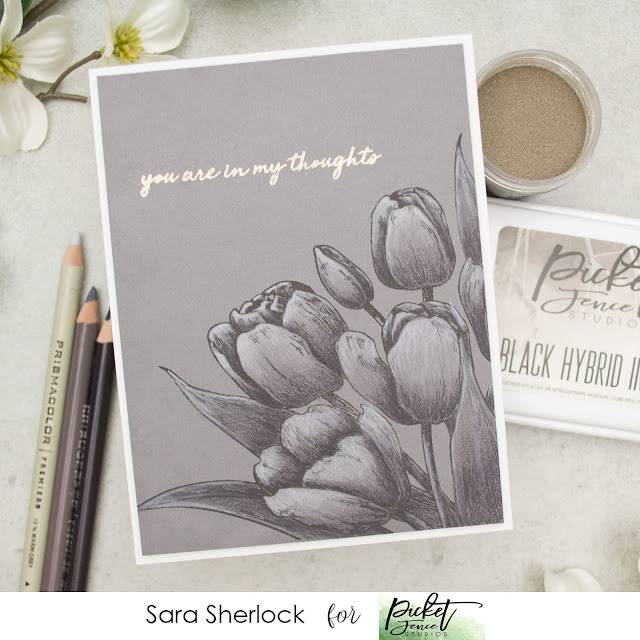
To start off, I created this pretty monochromatic tulip card. I stamped the Tulip image from the Early Tulip Bouquet Stamp Set, in Black Hybrid Ink, onto River Stone card stock.
I colored the image with my Prismacolor pencils, using only three shades of gray to blend. Then I stamped and heat embossed the sentiment with Platinum embossing powder. The card front was added to a white top-folding card base.
Card #2
This card took a lot of die cutting, but the final effect is so cool! I began by covering an A2 panel with Stick It Adhesive. I used the A Whale of a Tale Cover Die to die cut Mirror Silver paper, to create the frame, and adhered that onto the sticky panel. Then I die cut each color of card stock, and used tweezers to carefully place each of the pieces into place in the silver frame. Once all of the pieces were in place, I pressed the image down firmly using the side of my bone folder, to make sure they were all adhered.
Card stock colors:
Whip Cream, Banana Cream, Pool Play, Cool Pool, Blue Lagoon, River Stone, Tin Pail
The sentiment is from the Favorite Notification Stamp Set, that Picket Fence Studios released last month. I stamped, and heat embossed the sentiment in silver, and attached it to the card front with foam. A top-folding white card base was adhered behind the cover image.
Card #3
You know, with all of these Oceanic Creatures this month, I HAD to do an ink blended ocean backdrop on at least one card! I used the Life Changing Blending Brushes, and Distress Oxide Inks (the same colors as in this video tutorial) to create the background. The Turtles from the Swim in the Sea Stamp Set, were stamped with Barely There Amalgam Ink, and colored in using Prismacolor Pencils. The jelly fish were stamped and heat embossed in White, onto vellum, and then all of the images were cut out using the Coordinating Dies.
Distress Oxide Colors Used:
Tumbled Glass, Peacock Feathers, Mermaid Lagoon, Chipped Sapphire, Black Soot
I laid the images on my background in the MISTI to figure out the placement for the sentiment, then I stamped the sentiment in Denim Days. I adhered the images to the background, and then attached the card front to a top-folding white card base.
Card #4
I began this card by stamping the Wentletrap Shell Scene Stamp and coloring it in with Prismacolor Pencils. I die cut the image with the Coordinating Die, then set it aside to create my background.I stamped and heat embossed the View of the Sea stamp in gold. This stamp can create a seamless pattern by lining up the edges (I recommend using the MISTI). After it was heat embossed, I matted the panel onto Oatmeal Cookie card stock. Then, I die cut an oval from the center of the panel.
I taped a white top-folding card base to my work surface, and inked through the Current of Fish Stencil with Iced Spruce Distress Oxide ink, and then lightly blended Mermaid Lagoon Distress Oxide up from the bottom of the panel. I stamped the sentiment from the Wentletrap Shell Scene in Blue Lagoon ink, and then adhered everything together with liquid adhesive and foam.
Card #5
This final card, began by applying Snowdrop White Paper Glaze through the Mermaid Scales Stencil, onto Cool Pool Card Stock. I sprinkled fine glitter over the top of the wet glaze, before removing the stencil. I set that aside to dry.While the background was drying, I stamped the Seahorse from the Swim in the Sea Stamp Set - that I used on Card #3 - and the larger piece of coral from the Things on the Sea Floor Stamp Set, in Peaches and Cream Ink. I also stamped the smaller coral from that stamp set in Rich Coral Ink, and one of the seaweed stamps in Lemon Grass Ink. I colored in the images with pencils, then die cut them using the Coordinating Dies.
I also die cut the Hello Word Die, from last month's release, from Blue Lagoon card stock, and vellum, and cut a strip of the Blue Lagoon card stock for the side of the card front, and an angled banner from Mirror Silver paper. I clustered the images and cut outs, together, and adhered everything using liquid glue, and foam squares. I adhered the completed card front to another top-folding white card base.
I hope these cards inspired you! This really is a fun release, and I'm excited to start seeing all of the pretty things everyone will be creating with these items.
Thanks for stopping by!

Use this easy list to find the products I used in my projects.
(Contains affiliate links - where I earn a commission from purchases made from my links, at no cost to you. Your support helps me keep this blog going, and continue to create - Thank you! Affiliates and disclosures can be found here.) Please note, when possible, I try to offer multiple sources for the items I use.


No comments:
Post a Comment
I love comments! If you have any feedback or questions, please feel free to leave them here!