Hello!
I'm so excited to be sharing today's post with you. I was asked to guest design for Concord & 9th during September - which also happens to be their holiday release month! For the Fridays in September, I'll be showcasing a few items from the release - with directions as to how I made the projects. There is SERIOUSLY so much goodness in this release - I literally opened the package and the ideas just started flowing. Concord & 9th will also be sharing these projects, along with projects by the other guest artists, on their blog and Instagram - if you don't follow them, please do so for some great inspiration.
 |
| The 2019 Holiday Release |
**Warning: this is a long post with multiple cards and lots of photos. It may take a moment to load completely, if you are on a mobile device. All products used for each card will be listed in the directions, as well as listed and linked at the bottom of the post for your convenience. Affiliate links used - full disclosures can be found here.**
The stamp and die bundles that are being featured today, are the Christmas Florals Bundle, and the Silent Night Bundle.
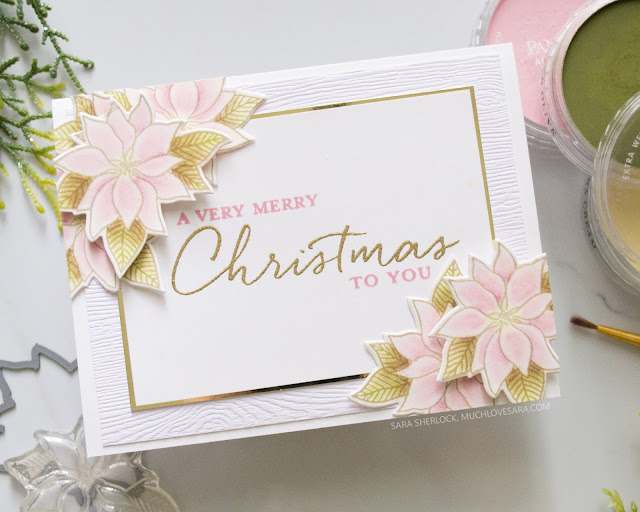
For this first card, I began by stamping the individual poinsettia stamp from the Christmas Florals Stamp Set. I stamped this image 5 times using Oatmeal Cookie ink. I used a watercolor brush, and a few PanPastels to color in the images. Using the brush means that the color is laid down very lightly, and it gives a beautiful pastel effect.
PanPastel Colors Used:
380.1 Red Iron Oxide Ex Dark, 220.1 Hansa Yellow Ex Dark, 680.3 Bright Yell. Green Shade
680.8 Bright Yell. Green Tint, 340.1 Permanent Red Ex Dark, 340.8 Permanent Red Tint
250.8 Diarylide Yello Tint
I layered the sentiment panel, and the card background together, then added it to a white card base. I adhered three of the poinsettias directly to the front of the card - overhanging the edges - before adding the last two flowers with foam squares. I trimmed the overhanging pieces off, and used a few of the trimmings to fill in any bare spots on the corners.
♥ ♥ ♥ ♥ ♥
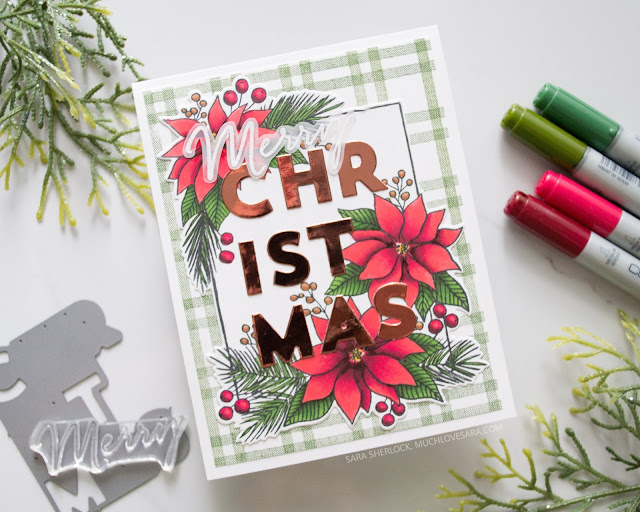
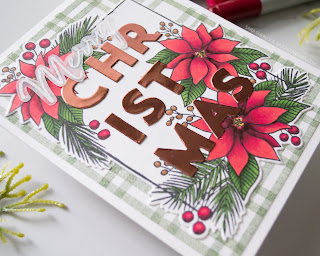
For this second card, I stamped the large image from the Christmas Florals Stamp Set in Black
Amalgam ink, and then colored in the image with Copic markers. When I color, I work from lightest to darkest, then work my way back to ensure that everything is blended. I also stamped and white heat embossed the scripty "Merry" onto a piece of vellum.
Copic Colors Used:
R24, RV29, R59, E29, Y17, YG17, YG67, G99, E34, E37, 0
Then I die cut the image, sentiment, and the letters using the Christmas Florals Die Set. The letters were cut from the Copper colored card stock from the Neutrals Foil Paper Pack. I used the Woven Stripes Background Stamp to stamp the background. On a 4" x 5.25" piece of white card stock, using Fresh Forest ink, I stamped the stripes horizontally first, then turned the card, and stamped the stripes vertically. (Note: Using the Turnabout Jig to do this can make lining the stripes up where you want them SO much simpler - particularly if you might need to double stamp!)
Finally, I adhered everything together. I used Multi Medium Matte to adhere the letters to the image, and then used tine daub of the same glue to adhere the vellum sentiment. Then I used an adhesive runner to attach the floral image to the background, and then the card front to the card base.
♥ ♥ ♥ ♥ ♥
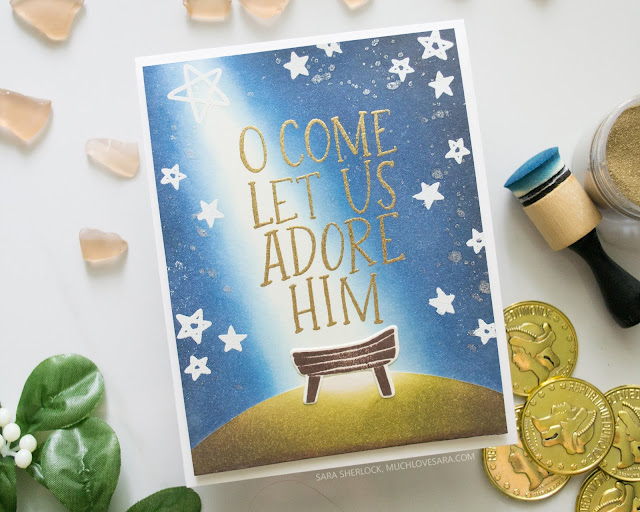
This third card was so fun to make, but turned the side of my hand blue for a couple days. I *MAY* need to start wearing gloves when doing this much ink blending!
I started this card by stamping my manger image from the Silent Night Stamp Set. Then, I die cut it using the coordinating die from the Sew Silent Die Set. On a card front sized piece of white cardstock, I lined the image up with the sentiment and large star stamp, to figure out placement. I very lightly drew some marks with a pencil, to let me know where I needed to ink my light beam and sky background. Then I started inking. I began by bringing the Chambray shirt ink from the outside edge to the edges of the light area. Then I added Denim Days Ink, and Black Licorice Ink on the outer edges, to deepen the color. Once I was satisfied with the blue coloring, I inked a bit of Buttercream Ink through the beam area, to soften the edges a bit further, and tone down the start white. I set this panel aside, to work on the hillside.
For the hill, I cut a curved edge on a piece of white card stock (You can freehand this, or use the edge of a round item to create a line to cut along). Then I inked up the hill with a bit of Oatmeal Cookie, and Dark Roast inks - being careful to leave a small portion at the top of the curve uninked. To tone the warmth down in the ink, and bring some green into it, I topped off all of the ink blending with Green Olive ink.
I made sure that the background was completely dry, and powdered it heavily with the embossing magic bag - just in case - before heat embossing my sentiment in gold. Then I heat embossed the stars around the perimeter of the card front. I tapped Sparkle Silk around the background, keeping it mostly contained to the blue areas. Then I used my liquid glue to adhere the hill and manger to the background. The card front was then attached to the card base with foam squares.
♥ ♥ ♥ ♥ ♥
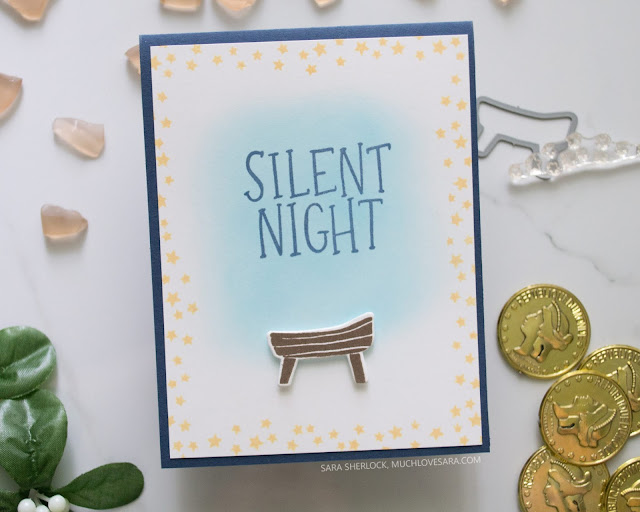
This final card is, quite possibly, the simplest of the bunch, but I kind of really love the simplicity with this one! I began by ink blending some Tumbled Glass ink slightly above the center of the card front, then allowing that to dry for a few minutes. I stamped the manger from the Silent Night Stamp Set onto a scrap of white card stock, and die cut if with the coordinating die from the Sew Silent Die Set.
I used a clear block to stamp the star cluster image around the edge of the card front in Pineapple Smoothie Ink. This fun border works best if you rotate the stamp as you go, so that the border is not too repetitive. One that was done, I used my heat tool to make sure that the ink blending in the center was completely dry, before stamping the sentiment in Denim Days Ink. The manger was attached with foam squares, and the card front was adhered to the Denim Days card base with an adhesive runner.
Thanks for stopping by!

Supplies Used:
Use this easy list to find the products I used in my projects. (Contains affiliate links - where I earn a commission from purchases made from my links, at no cost to you. Your support helps me keep this blog going, and continue to create - Thank you! Affiliates and disclosures can be found here.) Please note, when possible, I try to offer multiple sources for the items I use. Products with two or more logos - underneath, or on the side, give you options of where to purchase, in case the item has sold out at one shop. To visit the first store, click on the photo of the item. To visit the second (or greater) source, click the logo for the second shop - you will still be taken directly to the product.





No comments:
Post a Comment
I love comments! If you have any feedback or questions, please feel free to leave them here!