Showing posts with label All Dressed Up Stamps. Show all posts

Thursday, June 18, 2015

Loved more than you know

When I made my last wall hanging, I had shown a photo to a coworker who said it reminded her of her daughter.  She has two daughters at home, so, I gave her the first wall hanging and made this one for the other daughter.  This daughter apparently loves to talk and refers to herself as a social butterfly, so the butterflies that I punched from the dictionary paper have words just for her.


I used the "Fairy Magic" stamp from All Dressed Up Stamps.  I created the word art on my computer.  The background paper is from Authentique, and the key and heart shaped padlock are from Michael's.  Everything else is the same materials as were used in the previous wall hanging - Prima stencil; Shimmerz Sprays and Dazzlerz (I think stenciling with this shiny dimensional paste is my new favorite thing ever!); buttons, flowers, pearls, and lace from my stash.  


Challenges:

Saturday, May 16, 2015

Mixed Media Wall Hanging

There's another challenge at 613 Avenue Create this week!  This week, our optional twist is to create a Teacher/Educator gift or card. 

The sponsor that I am working with today is All Dressed Up Stamps.

We were given this adorable "Little Bookworm" stamp to work with today.  I decided to try a lot of FIRSTS with this project.  This is my first stamp that I've done on a laser printer (LOVE btw!).  This is also the first stamp I've done on a different paper.  Normally I just use a white cardstock, but I have watched an artist on Youtube, for some time now, who loves to use ivory cardstock on "people" images.  So, I had to try that.  And while it's a very subtle tone variation, I LOVED the way it made the skin tones so much easier and smoother.  I will definitely be keeping that in my bag of tricks!


I'm also trying out a few techniques I've picked up - from watching tons of mixed media Youtube videos - for the first time on this project.


And speaking of videos, this is the first video I've made for a 613 Avenue Create project!  It is a bit long (10 minutes), but if you're interested in how this project went from a piece of chipboard to the finished wall hanging, it is all in the video!


Be sure to stop on by 613 Avenue Create, and join in the challenge this week!

Products Used: 
Medium Weight Chipboard
ProArt Gesso
Liquitex Medium Matte Gel
Bella Blvd. Star Student Papers: "Daily Details" and "Chemistry"
Webster's Dictionary
Stencil (from Walmart - unknown brand)
Golden Modeling Paste
Crafter's Workshop Dots and Circles Stencil
Shimmerz Dazzlerz "Foiled Again"
Ranger Multi Medium Matte
Buttons from my stash
Iamroses flowers
Plaster Butterflies made from Mod Melts molds
Homemade mists in Coral Pink, Deep Aqua, and Peach
Shimmerz Vibez color sprays in "Jeni B Bleu" and "Hot Fudge"
Recollections Spray in Silver
Pearls from my stash
All Dressed Up Stamps "Little Bookworm"
Ribbon and Lace from my stash


Challenges:


Sunday, August 24, 2014

Post-It

It's time for another challenge over at 613 Avenue Create!   This time around, the optional twist to our Anything Goes challenge, is to create a Post-It Note holder.  We have several amazing artists providing prizes this week, so be sure to come over and check it out!  
I was able to work with this adorable image from All Dressed Up stamps this week.  I colored her up with my copics, and used my Sillhouette to cut a scalloped circle mat for the image.  Her wings were coated with my clear Wink of Stella pen, and then I frosted the edges with a bit of clear Stickles as well.  


I created the base for the Post-it holder out of lilac cardstock - and I kinda faked my way through it.  The first time I cut it out it was WAY to huge, so it took some trimming and finagling to get to the final box.  I used My Mind's Eye Collectable: Memorable papers to dress up the box and create the little pen loop.


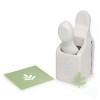
I cut the butterflies out of some coordinating card stock scraps with a Paper Studio punch, and then coated them with my WoS as well.  I adhered them to the project, and added some matching pearls that I dug out of my stash.


I'm always looking for a scrap of paper to write notes to myself, so I think this will be a super cute and cheerful addition to my desk.  Please come over to visit us at 613 Avenue Create, and see the other AMAZING creations by my teamies.

Have a great day!


Challenges:


Thursday, March 6, 2014

Soft and Pretty Birthday

I was wandering through Hobby Lobby recently, and found a bottle of Gamsol.  I've seen this used in many tutorials about coloring with colored pencils, so I had to buy it and give it a shot.  This cute image from All Dressed Up was my very first attempt.  I can tell you, that my pencil collection ranges from Prismacolors all the way to Crayolas, and the $5 for a ridiculous amount of pencils collection from Walmart.  The Gamsol was great at blending all of them, I just feel like I need more practice with my technique.  


I used ribbon and lace from my stash, and the flowers are from IAmRoses.   The sentiment is one of my own (a freebie from a while back).  I stamped the edges of my image panel with a prima stamp and the same tea dye ink that I distressed the edges of the papers.